

How To Repair A Kitchen Aid Kudi 01tjwh0 Dishwasher
KitchenAid Dishwasher Parts
Observe your function
Enter your model number or a part number and click "Search"
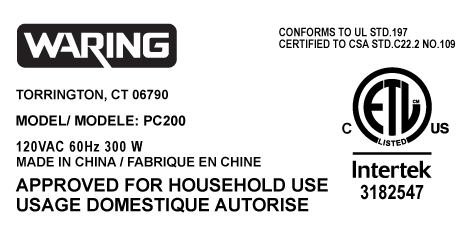
Here is an example model number plate:

Popular KitchenAid Dishwasher Parts
Dishwasher Lower Dishrack Bike Assembly - Gray
PartSelect Number PS11722152
Manufacturer Part Number W10195416V
This OEM gray Dishwasher Lower Dishrack Wheel Assembly is a plastic kit that allows the rack to slide in and out of the dishwasher easily. If it breaks or becomes damaged. sliding will experience hard. This can happen due to normal vesture and tear, and the part should be replaced if this occurs. Check your model number and user manual to make sure this office is correct. Information technology attaches directly to the dishrack. To repair, open the dishwasher door and pull out the lower dishrack. Next, push the tab from both sides and it should popular out. To install the new bike assembly, place it on the rack and make sure the caps overlap the wire from the inside before you lot clip it in identify by pushing the wheel. It measures roughly 3x6 inches.
Fixes these symptoms
- Door latch failure
- Door won't close
- Leaking
- See more than...
Installation Instructions
Thomas from W OLIVE, MI
Cleaved wheel unit on the lesser dish rack
All you lot do is pop out the old wheel unit at two (2) points on the plastic bike housing and pop in the new one. Easy fix. Less than a 5 minute set. Read more...
Mounting Bracket
PartSelect Number PS11745496
Manufacturer Part Number WP8269145
The mounting subclass is sold individually, without screws. This role secures the upper side of the dishwasher to the underside of the counter or cabinet to prevent the dishwasher from moving, shaking, or tilting forward. The bracket is made entirely of metal. It is recommended to check all brackets, if applicative, because they often clothing at the same rate and both may demand to be replaced. This is an OEM function that is sourced from the authentic manufacturer. Tools needed are a pair of needle nose pliers and a screwdriver.
Fixes these symptoms
- Door latch failure
- Door won't close
- See more...
Installation Instructions
Judith from Essex, MA
Lost dishwasher brackets
I called an experienced plumber, who balanced and installed my new dishwasher properly, using the brackets I ordered from Parts Select, after an INEXPERIENCED plumber had tossed the factory-provided mounting brackets out with the shipping carton. Relief! Read more...
Door Balance Link Kit
PartSelect Number PS972325
Manufacturer Office Number 8194001
This part is a door balance link kit, also sometimes known equally door cable or door spring cablevision kit, that helps support the door as information technology opens and closes past connecting to the dishwasher door hinges. The kit includes two door balance links and 2 door balance mounts with wheels, which will replace both the left and correct sides. The only tool needed is a 5/16 nut commuter. Before removing the existing kit, accept notation of how the door residuum link kit is assembled for a smooth replacement process. It is recommended to check the door springs in instance they demand to exist replaced too.
Fixes these symptoms
- Door latch failure
- Door won't shut
- Leaking
- Run across more than...
Installation Instructions
Scott from Fort Lauderdale, FL
Replaced Hinge Link
Pulled dishwasher from under counter, attached link to spring, hooked leap back into frame/chassis, threaded link through pulleys, fastened other stop of link onto door, reinstalled dishwasher under counter. All's well. Note-I purchased an extra link anticipating that the other one will fail. They're cheap enough. Read more...
Rack Rails Finish
PartSelect Number PS11746591
Manufacturer Part Number WP8565925
The rack rail stop on your dishwasher is designed to terminate the dish rack at the appropriate place when opening and closing the rack. If your dishwasher is non cleaning your dishes properly, the rack finish may need to be replaced. The replacement part may differ slightly from the cleaved part, depending on the model. However, the different styles are interchangeable. This product is sold individually and comes in both a white and gray plastic version. Many of our customers found this repair to be very piece of cake and takes less than 30 minutes to consummate. Just snap the quondam part out and snap the new function into place. You will not require any tools to complete the job. This is an authentic part canonical by the manufacturer.
Fixes these symptoms
- Door latch failure
- Door won't shut
- Non cleaning dishes properly
- See more...
Installation Instructions
Steven from WASHINGTON, DC
Upper rack wheels had begun to break off. Shoddy design and materials.
I carefully followed the video instructions step by footstep. They were detailed, clear, and pointed out how to avoid installation mistakes. WIthout the video I would take been tempted to only figure it out myself - ("Hey, I'm a handy guy. How hard could it be, correct?"). With the video I sailed right through with no dumb errors. The new rack adjuster wheel set is much sturdier than the Whirlpool original. Information technology made sense to get new rack stops at the aforementioned fourth dimension. Cheers, PartSelect. Read more...
Tine Pin
PartSelect Number PS11748190
Manufacturer Office Number WPW10082853
The tine pin clip, likewise known every bit the tine row pivot, is used in dishwashers and is located in the upper dishrack. At around 3 inches in length, the prune is used to keep the tine row in place in the dishrack. If your clip is cracked or damaged, it is best to supplant this part. To repair, first elevator the release tab and hold the other side to prevent it from falling off. After lifting information technology off, y'all tin set the new clip on the tine row and lock it up. Refer to the transmission provided by the manufacturer for farther installation instructions and guidance. Call back to wear work gloves as a safety precaution. This repair was rated as very easy past our customers and should be done in 15 minutes or less.
Fixes these symptoms
- Non cleaning dishes properly
- Run across more than...
Installation Instructions
Kathie from Breda, IA
Cleaved parts on rack
Easy...easy....I showtime watched YouTube videos on how to set our problem. We replaced both tracks and also the rack adjuster on both sides of the rack. The unabridged repair took about an 60 minutes and nigh of that fourth dimension was spent finding the tools at our house!! I ordered the parts on a Dominicus evening and they were at our house on Tuesday!!! Will apply this sight again if repairs are needed. Read more...

Dishwasher Upper Rack Adjuster
PartSelect Number PS11756150
Manufacturer Role Number WPW10546503
This OEM Dishwasher Upper Rack Adjuster is a grayish-black, plastic part which volition require a screwdriver to install. It fits onto dishwasher rack and connects it to the rail assuasive information technology to slide in and out. If cleaved then the rack will no longer slide properly, and the part must exist replaced. The installation has been rated as "piece of cake" by customers. Before beginning any repair, y'all should unplug the dishwasher and article of clothing gloves to protect your hands. Check your model number and user manual to run across if this part is right for you lot! Your dishwasher should accept a left and right upper rack adjuster, and both are the aforementioned function. These parts are sold individually, then if you are looking to supersede both, you will need to gild two parts. Please see equally follows for detailed repair instructions: Release the rails stops from the upper dishrack rail and pull the upper rack from the dishwasher and place it upside downwards on a work surface. Raise the wheels to the maximum peak. Release the summit of the long rear clip from the dishrack tine and push the prune down to the release bespeak and remove it. Press the tab downwardly on the front clip motion the clip up to pull it off. Release the locking tabs on the clip in the eye of the acme adjuster and remove the clip. Using a slot screwdriver pry the housing cover down and out to release the upper tabs on each side. Pry the bottom of the housing cover out of the 2 lower locking tabs. Pull the housing embrace off the rack. Remove the adjuster housing and wheel associates and repeat the procedure on the other side. Slide the vertical portion on the new wheel assembly betwixt the 4th gear up of vertical tines from the back of the dishrack and rotate the wheel associates so that it lays flat against the side. Insert a positioner clip above the rear bike and snap the tab into the slot. Install a positioner clip on the front bike. Position the adjuster body over the vertical portion of the cycle assembly and push in into the slots. Locking tabs at the bottom of the adjuster body engage the wheel assembly one time it is fully inserted the tabs. Insert the actuator lever into the adjuster trunk with the thumb pad facing the front of the rack. 2 one-half-circumvolve cutouts on the adjuster body concur the actuator in place. Button the adjuster trunk down and install the adjuster cover. Install the adjuster encompass mounting screws. Repeat this process on the other side of the rack. Push the upper dishrack onto its tracks.
Fixes these symptoms
- Door latch failure
- Door won't shut
- Leaking
- Meet more...
Installation Instructions
Kathie from Breda, IA
Broken parts on rack
Easy...easy....I first watched YouTube videos on how to ready our problem. We replaced both tracks and too the rack adjuster on both sides of the rack. The entire repair took about an hr and most of that time was spent finding the tools at our business firm!! I ordered the parts on a Sunday evening and they were at our house on Tuesday!!! Will utilise this sight once more if repairs are needed. Read more...
Dishwasher Dish Rack Adjuster Kit - Left and Right Side
PartSelect Number PS10064063
Manufacturer Part Number W10712394
This rack adjuster kit (Dishrack Adjuster Kit, Adjuster Kit, Dishwasher Rack Adjuster) volition adjust the summit of the upper rack of your dishwasher. Information technology connects to the dishrack. The kit is constructed of greyness plastic and metallic, and measures approximately 12 inches wide and half dozen.5 inches alpine. The rack adjuster can intermission from material fatigue or prolonged loftier temperature exposure. High temperature exposure can compromise the integrity of the materials. If the rack adjuster breaks, your upper rack may autumn down, may be unlevel, or the door may non close. This kit includes the parts to supercede the left and right-side rack adjusters and has been upgraded to a more durable metal design (2 adjuster assemblies, 1 left hand and i right hand actuator cover, 2 gray adjuster covers, and 2 gray adjuster housings)
Fixes these symptoms
- Door latch failure
- Door won't close
- Leaking
- See more than...
Installation Instructions
Paul from Encinitas, CA
Supervene upon rack adjusters - cycle were broken
Replacement was pretty easy after figuring out how to unsnap/unlock the old pieces. Tools only used to practise a niggling prying and poking, but really aren't needed. Everything either snaps or slides together. Piece of cake Read more...
Dishwasher Drain Pump
PartSelect Number PS11753379
Manufacturer Function Number WPW10348269
This drain pump is used in dishwashers to remove h2o from the dishwasher tub. If the impeller in the dishwasher is damaged or the motor has been shorted out and volition not drain, information technology is possible the trunk is croaky, causing leakage. To prevent this from happening, replace the bleed pump. The tools needed for this installation are: Phillips screwdriver, five/sixteen inch nut driver, 5/8 inch wrench, and a flathead screwdriver. Remember to unplug your dishwasher from the power source before beginning this installation project. Refer to the manual provided by the manufacturer for further installation instructions.
Fixes these symptoms
- Leaking
- Noisy
- Not cleaning dishes properly
- See more...
Installation Instructions
Andrew from Alexandria, VA
dishwasher not draining after wash cycle
Caviat: The bodily repair is less than 15 minutes, only I spent a lot of fourth dimension playing with it earlier I figured out it was that like shooting fish in a barrel and fast. Y'all don't need to remove the dishwasher from the counter to do this. And it will probably aid to look at the new office closely so you can sympathise where the servant clip is to printing it and release the old pump. First remove the h2o from the dishwasher pan that would not drain with a wet/dry out vac. Otherwise the h2o will all drain on the floor when y'all remove the pump. Then remove the two screws on the kickplate on the front of the unit below the door. Remove the kickplate/maintainence access cover. The bleed pump is on the right about eight inches in. Using two easily you grasp the drain pump with your correct hand and use the left hand to push the retaining prune down. And then the bleed pump will rotate 1/iv plough counterclockwise and tin can exist removed without pulling the dishwasher out. At that place is likely to exist some water leak out that was traped in the pump housing that yous tin not reach with the vac. Disconnect the wire. Connect the wire to the new pump, put it in place and 1/four turn clockwise to install it. Supervene upon the kickplate and you lot're done.
Rack Stop Prune
PartSelect Number PS11750071
Manufacturer Part Number WPW10195622
This manufacturer-approved Rack Stop Clip is a gray plastic part which can exist installed with a screwdriver. Measuring slightly over an inch in length, it prevents the rack from sliding too far and falling off. If broken or damaged, then the rack will slide too far and this is a sign the function should exist replaced. It attaches to the terminate of the top dishwasher rack. This prune can be used for the left or right side, and is sold individually. Information technology is a good thought to supercede both sides at once. To make this repair, start past pulling out the rack, then, using your screwdriver, reach in behind the rack stops and press the clips in. You should be able to remove the stops from the runway from here. Adjacent, you should be able to slide the track dorsum over the rollers and snap the new track stop into place.
Fixes these symptoms
- Door latch failure
- Door won't close
- Not cleaning dishes properly
- See more...
Installation Instructions
STEVEN from FAIRFAX, VA
Replaced top rack slider bar
Per the you tube video Read more...
Dishwasher Door Seal
PartSelect Number PS12348515
Manufacturer Part Number W11177741
Door seal seals the gap between the opening to the dishwasher tub and the outer edge of the door.
Installation Instructions
Larry from BENICIA, CA
Leaking gasket
Easily pulled one-time gasket from channel. Soaked new gasket in warm water. Cleaned debris from aqueduct with wire castor and CLR. Starting at summit-centre, gently pressed new gasket in place. Used a gentle push-pull technique on the corners. Used fingers to smooth gasket all around. Closed door and kept latched for 2 hours. Ran dishwaher to check for leaks. Read more than...
Appliance Type
- Dishwasher Parts
- KitchenAid Parts
Related Parts
- KitchenAid Dishwasher Brackets and Flanges
- KitchenAid Dishwasher Caps and Lids
- KitchenAid Dishwasher Circuit Boards and Touch on Pads
- KitchenAid Dishwasher Dishracks
- KitchenAid Dishwasher Dispensers
- KitchenAid Dishwasher Doors
- KitchenAid Dishwasher Ducts and Vents
- KitchenAid Dishwasher Filters
- KitchenAid Dishwasher Handles
- KitchenAid Dishwasher Hardware
- KitchenAid Dishwasher Hoses and Tubes
- KitchenAid Dishwasher Latches
- KitchenAid Dishwasher Motors
- KitchenAid Dishwasher Panels
- KitchenAid Dishwasher Pumps
- KitchenAid Dishwasher Racks
- KitchenAid Dishwasher Seals and Gaskets
- KitchenAid Dishwasher Spray Arms
- KitchenAid Dishwasher Springs and Stupor Absorbers
- KitchenAid Dishwasher Switches
- KitchenAid Dishwasher Wheels and Rollers
- KitchenAid Dishwasher Wire Plugs and Connectors
Popular KitchenAid Dishwasher Models
Below are the most popular KitchenAid Dishwasher models we have. Enter your model number in the search box to find your model.
- KDTE104DSS0 DISHWASHER
- KUDS35FXSS5
- KUDS30FXSS5
- KUDC10FXSS5
- KUDS01FLSS6
- KDTM354DSS4 DISHWASHER
- KUDS03FTSS3
- KDTE254ESS2 DISHWASHER
- KUDS30IXSS7
- KUDS30IXSS4
- KDTE204DSS0 DISHWASHER
- KUDS30IXBL8
- KUDS35FXSS8
- KUDS30IXSS8
- KDFE104DSS0 DISHWASHER
- KUDS35FXSS9
- KUDS02FRSS1
- KUDS30FXSS8
- KUDS30IVBL3
- KUDE40FXSS5
Taking the guesswork out of your repairs
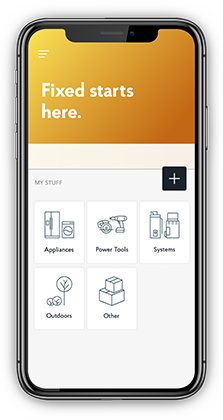
With our Fix app model plate image recognition engineering science, we'll recommend the parts guaranteed to fit your appliance. Simply snap a photo, and we'll have care of the remainder.
![]()
![]()

How To Repair A Kitchen Aid Kudi 01tjwh0 Dishwasher,
Source: https://www.partselect.com/KitchenAid-Dishwasher-Parts.htm
Posted by: muellercocia1974.blogspot.com
0 Response to "How To Repair A Kitchen Aid Kudi 01tjwh0 Dishwasher"
Post a Comment